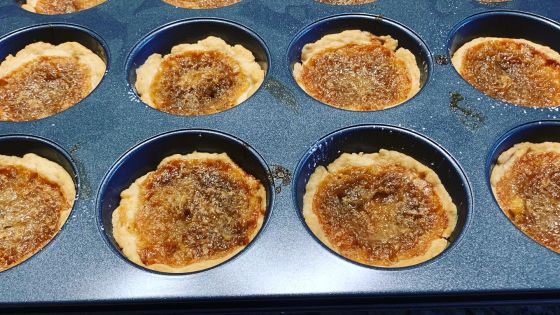
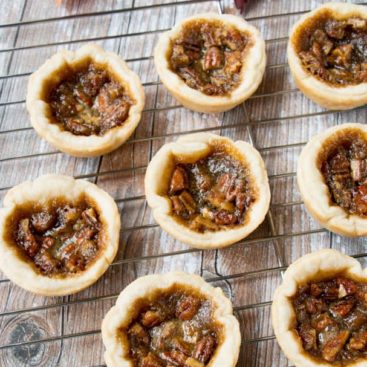
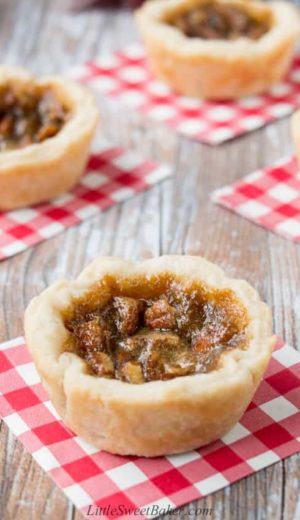
These famous Canadian butter tarts consist of a flaky pastry shell filled with a rich buttery caramel center. A new experience for our non-Canadian friends.
WHAT IS A BUTTER TART?
A butter tart is a small pastry tart filled with a deliciously gooey semi-solid syrup made up of butter, sugar, and eggs. Often dried fruit or nuts are added to the filling. These sweet little gems are said to have originated in Quebec back in the 1600s. Though, the first printed recipe for butter tarts was published in The Women’s Auxiliary of the Royal Victoria Hospital Cookbook in 1900, out of Barrie, Ontario. The original version of Canadian butter tarts was made with maple sugar, freshly churned butter, and dried fruit such as raisins or currents. Butter tarts became all the rage in the 1920s and 1930s. It’s one of the few authentically Canadian recipes that exist on paper. (source: Food Network Canada and Food Blogger of Canada) Whether a true butter tart has a runny or firm filling, plain or with raisins, is a matter of passionate national debate.
Butter Tarts
Materials
Pastry
- 3 cups all-purpose flour
- ½ tsp baking powder
- ½ tsp salt
- ½ cup shortening or lard
- ½ cup unsalted butter
- 1 large egg
- 1 tsp white vinegar
- 1 cup cold water
Filling
- ¾ cup brown sugar packed
- ⅓ cup unsalted butter
- 1 tbsp whipping cream
- 1 tsp vanilla
- 1 large egg
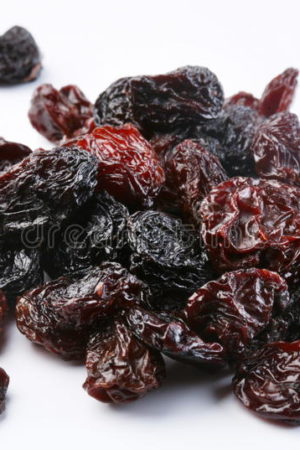
- ½ cup raisins
Instructions
- In a large bowl, toss together the flour, baking powder and salt.
- Cut in the shortening and butter using a pastry blender or two knives until mixture resembles coarse oatmeal.
- In a measuring cup, combine the egg and vinegar. Add enough cold water to make one cup.
- Gradually stir in the liquid, adding just enough to make the dough cling together.
- Turn the dough out onto a lightly floured surface and gather into a ball and divide into two equal portions. Tightly saran wrap both portions. Place one in the freezer for later use. Place the other in the fridge to chill for one hour.
- Roll the dough on a floured surface to about 1/8″ thick. Cut as many 4″ circles as you can. Re-roll the scraps and cut out more circles to make 12.
- Fit the pastry circles into a muffin pan and place back in the fridge until ready to fill.
- Preheat oven to 375F and position a rack in lower third of oven.
- In a small saucepan, melt the butter and brown sugar. Remove from heat and stir in the cream and vanilla. Let cool to touch (about 5 minutes) before whisking in the egg.
- Divide the raisins (if using) among the pastry shells and pour in the filling until half full.
- Bake for 13-15 minutes or until crust is lightly golden around the edges and filling is bubbling.
- Let cool completely in the pan. Best way to remove the tarts from the pan is to place a cooling rack (upside down) on top and flip the pan over. Then individually flip each butter tart right side up.
HOW TO STORE THEM:
Butter tarts can be stored in an airtight container for up to 2 days at room temperature or up to 5 days in the fridge. If storing in the fridge, you can eat them cold or bring them to room temperature before serving. After 3 days, it’s best to freshen up the tarts in the oven at 350F for 5-10 minutes to re-crisp the pastry.
CAN YOU FREEZE BUTTER TARTS?
Yes, butter tarts freeze really well. Place completely cooled tarts in an airtight freezer-friendly container or ziplock bag. Label with the date and store in the freezer for up to 3 months. For best results, freeze the day they were baked. Thaw overnight in the fridge and reheat in the oven at 350F for about 10 minutes.
To prepare the freezer dough for use: Thaw overnight in the fridge and leave out for 15 minutes at room temperature before rolling.
Butter tarts can be stored in an airtight container for up to 2 days at room temperature or up to 5 days in the fridge. If storing in the fridge, you can eat them cold or bring them to room temperature before serving. After 3 days, it’s best to freshen up the tarts in the oven at 350F for 5-10 minutes to re-crisp the pastry.
To freeze butter tarts: Place completely cooled tarts in an airtight freezer-friendly container or ziplock bag. Label with the date and store in the freezer for up to 3 months. For best results, freeze the day they were baked. Thaw overnight in the fridge and reheat in the oven at 350F for about 10 minutes.

